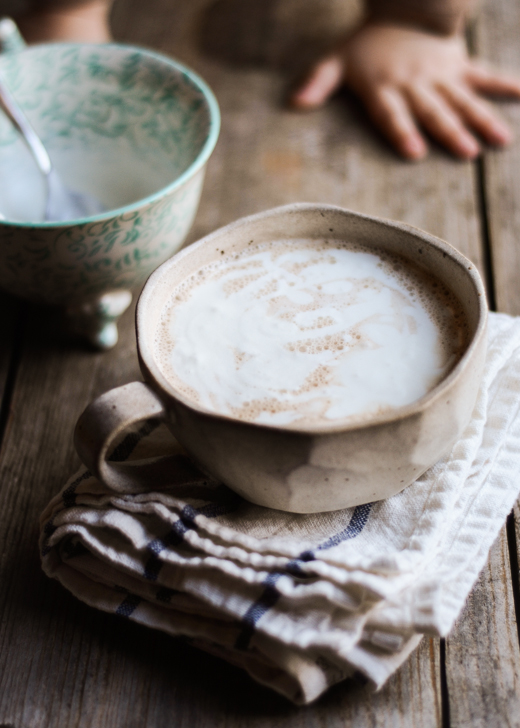
Showing posts with label Drink. Show all posts


This post was originally published on February 16, 2012 on Cooking for Seven.  A reader recently requested this recipe, so I thought I should share it here on Buttered Side Up!

001
Skiing is my favorite winter sport. Feeling the snow swish beneath my feet as I slide down the “mountain” (in Minnesota, the closest things we have to mountains are very large hills).
It’s always fun to plan out our lunches for skiing, trying to come up with something special and delicious. A few weeks ago, I decided that Frappuccinos would be a lovely treat. Creamy coffee drinks are my favorite.
Thus I purchased a pack of bottled Frappuccions. The words “low-fat” on the bottle disturbed me a bit, but I was sure they would be yummy anyhow. Alas, not so. We found them to be overly sweet and thin.  We dumped in some cream and they were improved immensely. But I was sure I could make something better myself.

002
Sure enough, I was able to produce something rich and creamy with much better flavor and less sweetener. That’s the beauty of making it yourself – you can customize it to your own personal tastes!
Here is my method for making your own creamy bottled frappiccino drink at home. Don’t think of it as a recipe as it’s meant to be highly customizable. I like my coffee fairly strong, so keep that in mind.

Homemade Frappiccinos Recipe 
Printable Page | Makes 1 serving
Ingredients:
  • 1/2 cup espresso or strongly brewed coffee
  • 1/4 cup + 2 tablespoons whole milk (none of this low-fat stuff)
  • 1/4 cup heavy cream (oh yeah)
  • 1 tablespoon + 2 teaspoons pure maple syrup (more to taste)
  • 1/4 teaspoon pure vanilla extract
Method:
Brew your espresso or coffee and place in the refrigerator until cold, about an hour or so. Add the remaining ingredients and stir or shake well (if using a bottle). Taste and adjust the ratio of milk, syrup, etc. Keep going until you love it. Enjoy!
This should keep in the refrigerator for a few days. I haven’t experimented with keeping it longer!

PS: This was the fourth photo I posted on Instagram. I liked it so much I included it in my blog post. :)


Note: some links are affiliate. All opinions are my own.

Homemade Frappuccino Recipe


How to Make Mocha
How to Make Mocha
How to Make Mocha
How to Make Mocha
How to Make Mocha
How to Make Mocha

I don't remember the first time I tasted a mocha. It was probably at a Starbucks or Caribou Coffee when I was 18 or so. In general I am nonplussed about most chain coffee drinks, but, if my memory serves me well, I believe that I quite enjoyed it. It wasn't extremely sweet like most specialty drinks. The flavors of the coffee and chocolate meld almost seamlessly.

I also can't remember the first time I made my own mocha, but I have made many since. Not gonna lie: it isn't the simplest coffee drink you'll ever make. But if you're already in love brewing your own lattes, the only extra steps are stirring in chocolate and adding whipped cream. If you're having a relaxed morning/afternoon, I highly suggest going to the extra effort to try this out.

I have included two ingredient lists: one that's milder and sweeter and one that's more intense. Reuben enjoys his coffee soft and sweet, I like mine with a bit of a bite. You can always experiment with the sweetener/milk levels until you get it just how you like it.


Notes:
  • This recipe is for an 8 ounce mug. You could use a larger one, but it won't be full.
  • You can use either cold or fresh espresso. If you decide to use cold, make sure that your milk is piping hot.
  • I like to use my little milk frother (I got mine at IKEA) to whip my cream. I can't be bothered with dragging out ANOTHER piece of equipment. 
  • This recipe calls for unsweetened cocoa powder, but you could also use chocolate syrup for a smoother consistency. Make sure you leave out or cut down on the maple syrup if you do.
  • I actually don't use a recipe most of the time when I make a mocha: I make it up as I go. Think of this recipe as a starting place and customize to your liking!
  • My preferred coffee maker is the Aeropress. Of course if you're all set up with an espresso maker you can make your espresso and froth your milk using your machine. Lucky you. 


How to Make a Caffe Mocha
recipe by Erica Kastner
makes one 8-ounce serving

His:
1/2 cup + 2 tablespoons half and half
2 teaspoons cocoa powder (I used cacao powder)
1/2 oz espresso, fresh or cold
1/2 ounce maple syrup
1/8 teaspoon pure vanilla extract
1 tablespoon heavy cream

Hers:
3/4 cup half and half
3 teaspoons cocoa powder
4 teaspoons espresso, fresh or cold
2 1/2 teaspoons maple syrup
1/8 teaspoon pure vanilla extract
1 tablespoon heavy cream

Directions:

1) Place your half and half in a small pan and heat until steamy. 

2) Meanwhile, place your cocoa powder in your favorite mug. Pour in half of the espresso. Stir until you have a fairly thick, very smooth mixture. This could take a bit of time. Stir in the remaining espresso, then the maple syrup and vanilla extract. 

3) Froth the hot milk using a handheld milk frother. Slowly pour the frothed milk into your mug. Whip your cream in a small bowl or cup with the milk frother until it's softly whipped. Spoon over your mocha. Enjoy!


How to Make Mocha

How to Make Mocha | His and Hers


Chocolate Syrup - Butttered Side Up

First of all, my apologies for being such a horrid blogger this past month. Earlier this summer I felt like I had a really good rhythm going. Then things got busy. Every weekend for the past 5 weekends we've had something going on. I'm looking forward to being able to catch my breath. 

This past year I've really been into chocolate milk, especially making it myself. Normally I'll mix it up as I go along: spoon some cocoa powder and sugar into a cup then mix in milk and cream. It tastes delicious, but it's kind of a pain to mix together. The milk doesn't always play nice and often refuses to be fully incorporated into the chocolate. 

Having a bottle of chocolate syrup in the fridge makes it so much easier. Simply pour into the milk and stir! No more lumps of chocolate. 

By the way, I HIGHLY recommend that you use some cream in your milk. Not quite half and half, more like 2/3 milk, 1/3 cream. But be warned: once you try it, just milk will never be the same. Also, I still blow bubbles in my chocolate milk. I think it freaks Reuben out. He's probably afraid that I'll teach it to Helen. Which I most likely will.


Homemade Chocolate Syrup
recipe adapted from Created by Diane | Printable Page

Ingredients:

Directions:

1) Place the water, sucanat and cocoa powder in a medium saucepan. Cook over medium heat, whisking occasionally, until the mixture comes to a boil. Remove from heat.

2) Stir in the vanilla extract. Allow to cool and pour into a jar or squeeze bottle. Store in the refrigerator. 


Note: Some links are affiliate. All opinions are my own and I would never share a product with you guys that I haven't already tested unless otherwise stated.

Homemade Chocolate Syrup for Chocolate Milk!


Blood Orange Lemonade | Buttered Side Up

I must admit that I don't really care for blood oranges. We picked up a bag at the supermarket and were very disappointed at the taste. Maybe we got a bad batch, but I was quite underwhelmed. 
And so I decided to juice them and turn them into a delicious drink. I also had some lemon juice leftover from making lemon curd, so I had the brilliant idea of combining them. A quick search on Pinterest (does anyone else use Pinterest like Google?) revealed that it was already a thing. I settled on a reliable-looking recipe and got crack-a-lackin'. 
Reuben loved the juice. I had to limit how much he drank so I would have enough to take pictures the next day.

And so something mediocre was rescued and turned into a yummy beverage.

This juice is quite intense: it kind of tastes like a grown-up Kool-Aid. You can use sparkling water in place of the water for a more punch-like effect, or you can add more water to make it less biting/sweet. Whatever you fancy!

NOTE: I didn't have full cup of lemon juice, so I reduced the amount of sugar to compensate and used a bit less water. You can always taste and adjust the sweetness if need be!


Blood Orange Lemonade
recipe from food network | makes about 4 servings | printable page

Ingredients:

For the Simple Syrup:
  • 1 cup sugar
  • 1/2 cup water
For the Juice:
  • 1 cup blood orange juice
  • 1 cup lemon juice
  • 3 cups water (sparkling or regular)

Directions:

For the syrup:
In a small saucepan, heat the sugar and water until the sugar has completely dissolved, about 5 minutes. Set aside.

To assemble:
Pour the juices and water into a pitcher. Add the syrup and stir to combine. Refrigerate into well chilled. Serve over ice, if desired.


And Now For the Winner of the Sucre Macarons! 

I asked y'all to tell me what dessert you were wishing for to enter the giveaway. Seriously, you guys have some awesome cravings.

Using random.org, I selected a winner. And that person is...

Commented #69: Erica (hey, hey!) who was craving chocolate with caramel. Nom nom. 

I have emailed Erica with details.

Thank you to all who entered the giveaway.
Have a lovely day!
xoxo
Erica

Blood Orange Lemonade + The Winner


This was originally posted on Cooking for Seven on December 12, 2012. Enjoy!

Peppermint Hot Chocolate
For some reason, I have been averse to pairing mint with chocolate my whole life. Whenever someone would order a mint mocha or mint chocolate chip ice cream I would inwardly shake my head in wonderment. Why ruin perfectly good chocolate with mint?

Peppermint Hot Chocolate
But I heard people raving about the peppermint hot chocolate at Starbucks. Could I be wrong in my presumption? I decided to give this mint-and-chocolate thing a try.
Am I ever glad I did. The fresh, strong flavor of peppermint lightens the rich, heavy hot chocolate perfectly. Which means you can drink more of this scrumptious beverage without feeling overwhelmed by the creaminess.

Recipe Notes
  • The original recipe suggests chopping your chocolate, but I just used chocolate chips and they melted perfectly.
  • The OR also directs you to bring the milk/cream to a boil and add it to the chocolate. I just put it all in a pot and let it melt together. Worked wonderfully!
  • The peppermint flavor that I used left little grease puddles at the top of my hot chocolate. If you’re a purist, go for a non oil-based flavoring.
  • I added a few drops of the peppermint flavoring to the whipped cream just for kicks. I highly recommend it.


Peppermint Hot Chocolate | adapted from Bon Appetit | makes 4 servings | PRINTABLE PAGE

Ingredients:
  • 1 cup chilled heavy whipping cream, divided
  • 1 teaspoon + 2 tablespoons sugar or sweetener of choice
  • 2 cups whole milk
  • 4 ounces bittersweet chocolate chips or chocolate bar, chopped
  • 1/4-1/2 teaspoon peppermint flavor
  • candy canes, for garnish
Directions:
1) Place 1/2 cup cream, 2 tablespoons sugar, the milk and chocolate in a small, heavy-bottomed saucepan. Cook over medium heat, whisking constantly, until the chocolate has completely melted and is smooth. Remove from heat and stir in the peppermint flavor.
2) In a small bowl, beat the remaining 1/2 cup chilled cream with a few drops of peppermint flavor (optional) until soft peaks form.
3) Serve the hot chocolate with whipped cream and a sprinkling of crushed candy canes. Enjoy!

Homemade Peppermint Hot Chocolate


I originally posted about this awesome eggnog three years ago on Cooking for Seven. It's still a favorite at Christmastime, so I felt I should share it here on Buttered Side Up.
Our family has always enjoyed a good cup of eggnog at Christmastime. Mom would carefully pour out a small portion and add a bit of milk to make it less rich. We kids would savor the little we got and agree that any more would be too much.
These days I prefer to make my own eggnog. I know exactly which ingredients go into it. And it is such fun to make.


Homemade Eggnog

If you're still not feeling confident about making your own eggnog, head over to the Tasty Kitchen Blog where I share my step-by-step instructions HERE.

By the way, it is VERY important, if you have an instant read thermometer, that you make sure it is set to Fahrenheit instead of Celsius. I once bumped the button by accident and made "scrambled eggnog." Gross.


Homemade Eggnog
Adapted from a recipe from a friend.
Ingredients:
  • 12 large eggs
  • 1 1/2 cups maple syrup (or granulated sugar)
  • 1/2 teaspoon salt
  • 2 quarts (8 cups) whole milk
  • 2 tablespoons vanilla extract
  • 1 teaspoon freshly grated nutmeg + more for garnish
  • 2 cups heavy whipping cream
Directions:
1) In heavy 4 quart saucepan, off heat, whisk the eggs, maple syrup, and salt until well blended. Gradually stir in half of the milk.
2) Cook over low hear, stirring constantly, until mixture thickens and coats the back of a spoon, about 25 minutes
(mixture should be about 170 – 175 degrees F). Do not boil.
3) Pour custard in a large bowl. Stir in vanilla extract, 1 Tsp. ground nutmeg and remaining milk. Cover and refrigerate until well chilled, about 3 hours.
4) Just before serving, in a medium bowl, beat whipping cream until soft peaks form. With wire whisk, gently fold whipped cream into custard mixture. Serve with extra whipped cream on top and a sprinkle of freshly grated nutmeg.
Store in the refrigerator up to 3 days.
Makes about 16 cups or 32 – 1/2 cup servings

Homemade Eggnog


Veggies for Roasting
I have been obsessed with roasting veggies lately. Here's a little something that I dreamed up: Roasted Vegetable Chicken Alfredo. I baked up a pan of broccoli, grape tomatoes and garlic (drizzled with olive oil and sprinkled with sea salt) and added it to a basic Alfredo sauce. It was awesome.
By the way, lining your pan with parchment paper is the best. No dangerous aluminum and no nasty cleanup.


Roasted Tomatoes
I also roasted up a pan of heirloom tomatoes that I got from the co-op. I pureed them with some cream and used it as a sauce for pasta. Reuben really like it, even though it didn't have any meat! Here's what the finished product looked like.
I usually roast my vegetables between 400 and 450 degrees F for about half and hour, or until they look done to me.


Infused Water
You guys. Infused water is so refreshing. I experimented with a blend of lemon, cucumber and mint. Reuben calls it pickle water (he doesn't care for cucumbers), but I like it.


Figs
I tried figs for the first time! It's quite a different flavor, but I enjoyed it. We sauted them with butter and honey and served them over vanilla ice cream. Delicious.


Vintage Silver
I LOVE the vintage silverware I got from Reuben's grandma. Some of the pieces are very odd. I'll have to do a bit of research to learn the intended uses for them.


Shiny Red Kitchen Aid!
I finally purchased a Kitchen Aid stand mixer! I found it for almost half-price on Gilt (BTW, if you use my link you'll get $25 off your first order and I'll get $25 off my next order!). I have waited for over two years for this. Now I can make bread without hand-kneading it!


Helen
And of course I have to throw in a Helen update. This little rascal started crawling last month (at 6 months old) and is starting to pull herself up onto things everything (almost 7 months old). She keeps me on my toes - she's already an expert at Getting Into Things. And she's VERY interested in my food photography.

If you'd like to read more about Helen and see pictures from my everyday life, check out my personal blog and my Instagram.

Also, let me know in the comments if you like these inspiration/life update posts, or if you'd prefer that I keep it to recipe posts. 

Have a lovely day!
Erica

Cooking Inspiration + Life Lately

Sparkling Strawberry Jasmine Green Tea

001Sparkling Strawberry Jasmine Green Tea

Sparkling Strawberry Jasmine Green Tea

Sparkling Strawberry Jasmine Green Tea

So. Our house flooded.

     At six thirty in the morning we heard Grandpa calling from upstairs (we live in the basement apartment of Reuben's grandparents' house). At first we thought one of them had fallen down, but it soon became apparent what the real problem was. 
      As I stepped out of our bedroom, I was sloshing through over half an inch of water. Grandma's washing machine valve had busted in the middle of the night, spraying water everywhere and raining down into the basement. Luckily we don't keep much on the floor so nothing was ruined. My camera had managed to be directly under a drip, but it was unharmed; and the water stopped JUST before it got to my computer desk.
     Now we're all dry again and thankful it wasn't any worse.

But about this iced tea.

     I can't say that I'm much of a flavored drink person. Generally speaking, give me water or milk and I am perfectly content. But on these hot summer days, it's fun to keep hydrated with something tasty.
     Pop (or Soda, if you must) is generally not an option: I don't care for the high-fructose-corn-syrup-laden stuff, except for the occasional root beer float. You can blame my conscientious dad for that. He always made us order water at restaurants and very rarely brought sugary drinks into the house.
     And so I've been enjoying trying out new drink recipes. This recipe caught my eye because the flavor combination was different than anything I had ever tried. I was worried that Reuben wouldn't care for it and I'd be drinking the whole pitcher myself. When he heard that I was putting an entire pint of strawberries into tea he freaked out a little. But he thought it was yummy and even asked if there was any left the next day. 
     While I was pouring the boiling water over the tea bags, my (glass!) tea kettle slipped out of my hands, spilling water everywhere. For some reason it didn't break when it hit our tile floor. Reuben grabbed a towel and started wiping up the mess, but I said, "Wait! It looks cool," and proceeded to take photos. 


Recipe Notes:

     The original recipe didn't specify Jasmine green tea, but it sounded kind of lovely to me so I went for it. The flavor is a little different, so if you prefer a more "normal" iced tea you could use regular green tea (or even black tea, if that's your thing).
     Of course I used a natural sweetener. You could always use white sugar if you prefer. And I followed my instincts and decreased the sugar by 1/4 cup. I might go down to 1/2 cup next time.
     And I decided to fill the gap of the spilled water with some sparkling water - that really made this drink, in my opinion.


Sparkling Strawberry Jasmine Green Iced Tea
adapted from Sprinkled With Flour | makes approximately 6 servings | PRINTABLE PAGE

Ingredients:
  • 1 pint fresh strawberries, washed and hulled
  • 1/2-3/4 cups sweetener of choice (I used evaporated cane juice)
  • 2 1/2 cups water
  • 5 green tea bags (Jasmine scented or regular)
  • 2 1/2 cups sparkling water
  • Ice cubes, for serving

Directions:

1) Place the tea bags in a heat-proof bowl. Place 2 1/2 cups of water in a tea kettle and bring to a boil. Pour over the tea bags and allow to steep for 2-3 minutes. Remove bags and discard.
2) Meanwhile, place the strawberries in a blender and puree until completely smooth. Place in a small saucepan with the sweetener and heat over medium-low heat until the sugar dissolves.
3) Pour the strawberry puree into a heat-proof pitcher along with the tea and stir. Place in the refrigerator to cool completely.
4) Just before serving, pour the sparkling water into the iced tea. Taste and adjust the amount of water if needed. Serve over ice cubes.


Linking up at Party Wave


Sparkling Strawberry Jasmine Green Tea


Tea + English Muffin

Wordless Wednesday: Tea + English Muffin