Gingerbread Waffles


Gingerbread Waffles
Tasty Kitchen Blog Gingerbread Waffles 02.jpg
Tasty Kitchen Blog Gingerbread Waffles 13.jpg
Gingerbread Waffles

Growing up, I didn't really care for gingerbread. My palette was highly influenced by my dad, who disliked the spices in it, particularly nutmeg. Crazy, I know! As I grew older and met friends who adored molasses spice cookies, I decided to reevaluate my stance on gingerbread. When I tasted it with an open mind, I discovered that I loved it.

Now I'm attracted to anything "gingerbread" flavored. When I saw the recipe for Gingerbread Waffles, I knew I needed to give it a try.

Stop by the Tasty Kitchen Blog to see my step-by-step photos and get the recipe!

Have you ever changed your mind about food?


Christmas Brunch Ideas


Christmas is almost upon us!

I think that a Christmas morning brunch is a lovely thing. It's become a bit of a tradition in my family's house to open presents and then have a large breakfast. If we're feeling particularly chipper, we have the full menu of eggs, sausage, stollen, cake, fruit, eggnog, coffee, etc. It's glorious.

Here are a few ideas for you to help plan a brunch menu:


I die. Chorizo Breakfast Hash - www.countrycleaver.com

Chorizo Breakfast Hash from Country Cleaver


Shredded hash browns and cheese nests baked until crispy topped with a baked eggs, crumbled bacon and more cheese. Served with chilled avocado slices.


Lemony Eggs Florentine

Lemony Eggs Florentine from Williams-Sanoma


Baked Egg Boats

Baked Egg Boats from Spoon Fork Bacon


Simple Poached Egg and Avocado Toast - this creamy, filling, real food breakfast takes less than 10 minutes to prep! | pinchofyum.com


Dirty Chai Pancakes

Dirty Chai Pancakes from here on Buttered Side Up


Bacon Breakfast Rolls with Maple Glaze

Maple Bacon Cinnamon Rolls form Culinary Concoctions by Peabody


Stollen09

Stollen Bread from Artisan Bread in Five


Bruléed Grapefruit

Bruleed Grapefruit from Pastry Affair


salted caramel eggnog pancakes

Salted Caramel Eggnog Pancakes from The Merry Thought


stollen scones | She Who Eats

Stollen Scones from She Who Eats


Peppermint Hot Chocolate

Peppermint Hot Chocolate from here on Buttered Side Up


Homemade Eggnog from here on Buttered Side Up


salted nutella latte.  I should not have even let this thought enter my mind.

Salted Nutella Latte from The Faux Martha


Now I want to consume way more breakfast food than is good for me.


What are YOUR plans for Christmas?


Pizza Stuffed Mushrooms


Pizza Stuffed Mushrooms

Sometimes, you just KNOW a recipe is going to be good before you make it. Some combinations of ingredients are just hard to mess up. I mean, how could Pizza Stuffed Mushrooms be bad?!

These were far, far from bad. I wanted to eat the whole pan by myself. But I selflessly shared them with Helen, Susan (her cousin) and Reuben. They all enjoyed them. 

I think these would be a smashing appetizer for just about any occasion. You could make them up beforehand and pop them into the oven at the last minute. Just be sure to make lots - they'll be gone in a flash.


Pizza Stuffed Mushrooms
Recipe adapted from Tasty Kitchen
Makes 3 servings

Ingredients:
  • 10 baby bella mushrooms
  • 4 ounces (half a package) of cream cheese
  • 1/4 cup grated Parmesan cheese
  • 1/4 teaspoon dried basil
  • 1/8 teaspoon dried oregano
  • 1/8 teaspoon garlic powder
  • salt and pepper, to taste (I didn't need any)
  • 1/4 cup finely diced pepperoni (I like this brand)
  • 2 tablespoons finely chopped green bell pepper
  • 2 tablespoons finely chopped red onion
  • 2 tablespoons finely chopped black olives.
Directions:

Preheat your oven to 350 degrees F (175 C). Line a baking sheet with parchment paper or a silicon baking mat.

Wash and dry your mushrooms. Scoop out the stems with a spoon. Set aside.

In a small bowl, combine the cream cheese, Parmesan, basil, oregano, garlic powder, salt and pepper (if using), pepperoni, green pepper, onion and black olives. Make sure everything is well combined. 

Fill and mound each of the mushrooms with the filling. Place on the prepared baking sheet and bake in preheated oven for 20-25 minutes, or until nicely browned. You can also place them under the broiler for a minute or two to brown the tops. Serve hot (they cool down quickly).

Cinnamon Roll Cake with Maple Cream Cheese Frosting


This was originally published on August 1st, 2011 on Cooking for Seven. 


Cinnamon Roll Cake | Buttered Side Up

Some days, you just need a recipe that doesn’t call for fancy ingredients. You don’t have any specialty items on hand, but you still want to bake something utterly scrumptious.


Cinnamon Roll Cake | Buttered Side Up

This cake definitely fits the bill. A soft, cinnamon-scented batter is filled with buttery, sugary swirls. Top it off with a drizzle of maple and cream cheese frosting, and you have one delicious treat.


Cinnamon Roll Cake | Buttered Side Up

Notes:
The original recipe called for a powdered sugar glaze. I much prefer a less-sweet cream cheese based frosting. So I made up a recipe for drizzly maple-cream cheese frosting.
As per my usual substitutions, I used whole wheat flour in place of most of the AP flour, and maple sugar instead of brown sugar. I also added a bit of cinnamon to the cake batter to enhance the flavor. You can add pecans to the topping, but I didn’t have any on hand, so I left them out. Besides, my husband doesn’t like nuts in baked goods.


Cinnamon Roll Cake with Maple Cream Cheese Frosting
Adapted from Divine Baking | Printable Page | Makes approximately 8 servings

Ingredients:
For the cake:
  • 1 cup whole wheat flour
  • 1/2 cup AP flour
  • 1/8 teaspoon salt
  • 1/2 cup maple sugar, demerara, sucanat, rapadura, or brown sugar
  • 2 teaspoons baking powder
  • 3/4 cups whole milk
  • 1 large egg, lightly beaten
  • 1 teaspoons pure vanilla extract
  • 1/4 cup (1/2 stick) butter, melted
For the topping:
  • 1/2 cup (1 stick) butter, softened
  • 1/2 cup maple sugar or sweetener of choice
  • 1 tablespoons AP flour
  • 1 1/2 teaspoons cinnamon
  • 6 tablespoons chopped pecans, optional
For the maple cream cheese frosting:
  • 4 oz. (1/4 lb.) cream cheese, softened
  • 3-4 tablespoons pure maple syrup
  • 1/4 teaspoon pure vanilla extract
  • 1-2 tablespoons whole milk
Directions:
1) Preheat oven to 350 degrees F. Grease a round cake pan.
2) In a large bowl or in the bowl of a stand mixer, whisk together the whole wheat flour, AP flour, salt, sugar, and baking powder. In a small bowl, combine the milk, egg, and vanilla. Beat into the dry ingredients until well combined. Slowly stir in the melted butter. Pour batter into prepared pan.
3) In a large bowl, mix the softened butter, maple sugar, flour, cinnamon and pecans (if using) until well combined. Drop evenly over cake batter by the tablespoonsful and use a knife to marble/swirl through the cake.
4) Bake at 350 degrees for 25-30 minutes or until toothpick comes out nearly clean from center. You want to make sure it’s done.
5) Beat the cream cheese with a hand mixer until smooth. Slowly add the maple syrup and vanilla. Add a few tablespoons of milk, if necessary, so the frosting can be drizzled. While the cake is still warm, drizzle the frosting on top. Serve warm or at room temperature.


Cinnamon Roll Cake | Buttered Side Up


2014 Gift Guide


2014 Gift Guide

First off, sorry about no post on Monday. On Sunday I contracted a horrible cold, complete with sore throat, runny/clogged nose, weakness and headache. And it lasted for 3 days. But on to more pleasant things, like Christmas.

I did the shopping for you!

I have compiled for you a list of gifts that I'm sure would please the cooking enthusiast in your life. I either own and cherish or desperately want need these things (hint hint Reuben).

I have arranged these from most to least expensive. Items marked with an * are ones that I own and love.


2014 Gift Guide, Set 1


Copper Pitcher ($88) - Who wouldn't want a copper pitcher?!

Frieling Stainless French Press ($79.95) - Make your coffee in style.

Copper Dutch Oven ($76.99) - I'm a bit obsessed with copper. 

Berry Colander ($48) - I've been eyeing this one for a long time.

Mignon Kitchen Goodies Box ($40) - A sampling of things from the lovely Mignon Kitchen.

*Olive Wood Cutting Board ($39) - I have the smallest size, which is sold out.

Donna Hay New Classics Cookbook ($37.87) - I love all things Donna Hay.

*AeroPress Coffee Maker ($30.20) - Best cup of coffee I've ever made. 

Wooden Cookbook Stand ($30) - Keep your cookbook/tablet upright in style. 

Ittala Bowl ($28) - Another that I've been eyeing for a long time. I love the design!

*Fino Pour Over Kettle ($26.70) - This is the best kettle I've ever used. It's small, but it's all I need.


2014 Gift Guide, Set 2


Letterpress Recipe Cards Set ($25) - I love letterpress. 

Global Salt Trio ($25) - For someone with a refined palette. 

*Chef's Torch ($24.97) - Every cook needs a torch. Amen.

*Weck Jar Set ($18) - These are some of my most loved items.

Wooden Measuring Spoons ($17.99) - These are just adorable.

*Garlic Twist ($17.50) - This makes mincing garlic so easy. Helen likes to do it for me.

The Nourished Kitchen Cookbook ($16.76) - Reuben's mom has this. It's definitely for someone that's more adventurous in the kitchen, but it's lovely. 

Boulder Mug ($16) - I own a more squat version of these and them to DEATH.

Fugi Blossom Rice Bowls ($15.96) - Does a girl need an excuse to own more bowls? No.

The Einkorn Cookbook ($15.76) - I really want to read this one.


2014 Gift Guide, Set 3


Chopstick Noodle Bowl ($14) - I've always wanted a chopstick noodle bowl.

Printed Enamel Mug ($14) - For the blogger in your life. 

*Silpat Baking Mat ($13.89) - This is just so classy.

No Filter Mug ($12.99) - For the Instagram lover in your life.

Stainless Steel Smoothie Straws ($11.97) - I have some similar to these, and I love them. 

Stainless Steel Lunch Box ($9.99) - Pack your lunch with flair. 

Paper Cheese Bags ($9.64) - Another one I really want to try. It kinda hurts to store cheese in plastic bags.

Bamboo Sushi Set ($7.98) - For the sushi enthusiast. 

*Chocolove Almond and Sea Salt Bar ($7.50 - much cheaper in stores) - This flavor is heavenly.

Mini Spatulas ($6.50) - Because you always need more of these.

Bamboo Storage Bowl ($5.99) - So retro. 

Mosaic Tea Tins, set of 2 ($5.98) - These would look so cute sitting on the counter.


What's on YOUR Christmas List?


NOTE: Some links are affiliate. All opinions are my own.

Crispy Potato Casserole


Crispy Potato Casserole


First, let's talk life.

For some reason, as Hannah admitted the other day, I've had creative burnout lately. Perhaps it's because I was doing an exercise program which used up lots of my energy. Or maybe because I injured my wrist and everything feels like twice the work as usual. Or it could be that I've just been in a lazy slump.

Whatever the case, it feels like I've been going through the motions and haven't been able to make as many things for you guys as I'd like. And that saddens me. Hopefully December brings renewed creativity!

But about these potatoes.

I must admit that the biggest selling point for this dish is the presentation. All the thin, crispy slices of potatoes look so pretty and impressive. 

You could easily please many people by adding cheese and cream to your potatoes (I'm not saying those are bad additions to potatoes by any means), but sometimes potatoes look their best when they're simple. And if anyone is saddened by the lack of dairy products, you can serve these with sour cream. Pesto is also a delicious condiment.


Notes:
  • You don't want to over-cook these potatoes. There is such a thing as too crispy. Mine were on the edge.
  • Unless you detest it, please don't skip the thyme. It really helps to deepen the flavors.


Crispy Potato and Bacon Casserole
Adapted from Joyously Domestic | Makes 4 servings

Ingredients:
  • 5 medium-sized potatoes (I used russets and reds, but I think golds would work as well)
  • 4 tablespoons butter, melted
  • salt and pepper
  • 3 1/2 ounces bacon, chopped into little pieces
  • thyme sprigs (fresh or dried)

Directions:

Preheat your oven to 375 F (190 C). 

Peel the potatoes and slice them very thinly. Brush a round baking dish (mine was about 7 inches) with some of the butter. Arrange the slices upright in the dish. Pour some of the butter over the potatoes and brush the rest on top of the potatoes.

Sprinkle with salt and freshly ground pepper. Bake, uncovered, for 1 hour and 25 minutes. If the potatoes start to look too dry, brush them with some of the butter in the bottom of the pan.

Meanwhile, as the potatoes are baking, cook the bacon in a cast iron skillet over medium heat until crispy. If you don't like your bacon overly crispy make sure to under cook it slightly. 

Sprinkle the bacon over the potatoes, add a few sprigs of thyme and slide it all back into the over for another 25-35 minutes, or until the potatoes are nicely crisped (but not over-done). Add a bit more salt and pepper if desired. 

Serve hot with sour cream or pesto. Any leftovers can be reheated in a pan with some butter.


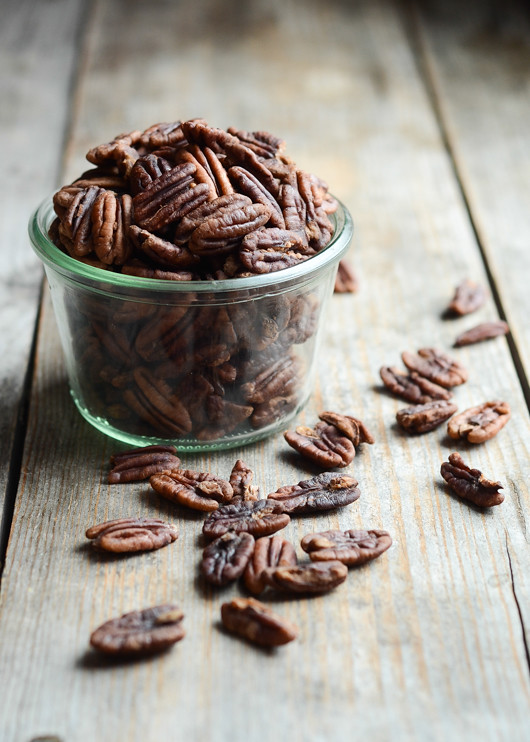
How to Soak Pecans for Digestion


Soaked Pecans | Buttered Side Up

The first thing you might be thinking is: why would I ever want to soak my pecans?

Pecans are a great source of vitamins and minerals. They contain vitamin B1, Copper, Magnesium and Manganese, Zinc, and much more. However, like other nuts and seeds, pecans contain enzyme inhibitors, tannic acid, and phytic acid. These substances can mess with your digestion and absorption of nutrients. Thus the healthy properties in nuts are kind of negated.

What's a health-conscious girl to do?

By soaking your pecans in a briny solution you can deactivate the negative properties. The salt in the soaking water also activates enzymes in the nuts that neutralize the enzyme inhibitors.*

Once your pecans are soaked for the proper amount of time you can dehydrate them to make them a lovely, crispy texture. 

You can read more about the benefits of soaking nuts in this great blog post by Kimi of The Nourishing Gourmet. She also gives methods for soaking other nuts here.

Note: It's important to dehydrate your nuts at the proper temperature. If you go higher than 150 degrees F (65 C), the beneficial enzymes that you activated by soaking can be destroyed. My oven only goes down to 170. Next time I'll leave my oven door open a tad to lower the temperature.


Soaked and Dehydrated Pecans

Ingredients: (can increase amounts as needed)
  • 1 cups of pecans
  • 1/2 teaspoon real salt
  • Filtered water to cover nuts

Directions:

Place the pecans and salt in a glass or stainless steel bowl. Add enough filtered water to cover. Stir. Place a kitchen towel on top and leave in a warm part of your kitchen for at least 7 and up to 12 hours. 

Drain in a colander, spread on a stainless steel cookie sheet (or dehydrator trays) and place in a warm oven (105 to 150 degrees) until the pecans are nice and crispy, stirring occasionally, about 12-24 hours. 

Store in an airtight container in a cool place for a few months, or longer in the refrigerator. 


Note: Some links are affiliate. As always, all opinions are my own.

Nākd Fruit and Nut Bars Review


Nakd Bars Review
Last month, the people at Natural Balance Foods contacted me, wondering if I would be interested in reviewing some of their "Nākd" fruit and nut bars. I had never heard of the brand, so after doing a bit of digging and asking a few questions, I agreed to give them a go!


Nakd Bars Review

Natural Balance Foods is a UK-based brand that has just recently started offering their products to US customers. Their Nākd Bars have no added sugar or syrup and are wheat, dairy and gluten free. 

What initially drew me to try out these bars was the small list of ingredients. Most of them are composed of dried fruit, nuts and natural flavorings.

I was a bit concerned about the "natural flavorings" at first, but the lady I communicated with gave examples of the natural flavor such as "extract from an orange" and "natural chocolate flavour from cocoa powder." 


Nakd Bars Review

The Nākd Crunch Bars do contain "soya protein crunchies." The added crunch was pleasant, but I personally try to avoid soy products.

Another thing to note is that these bars contain nuts that haven't been soaked for optimal nutrition and digestibility. I do think that these are a better choice than the majority of the snack/protein bars on the market, but I wouldn't recommend consuming huge quantities. You can read about the importance of soaking nuts here and here.

Also, some of the bars are listed as "GM Free" on the website, while others are not. I'm not sure if that means that those not listed as GM Free contain genetically modified ingredients or not. I'll let you guys know if I find out.


Favorite Bars

I thought I'd highlight for you guys my top five bars (in no particular order) from the ones I received:

1) Rhubarb Custard: I liked how this one was slightly tangy.
2) Cocoa Orange: To my surprise, this one tasted very much like a tootsie roll!
3) Ginger Bread: I thought the spices went really well together.
4) Berry Delight: I'm a raspberry fan, and again I enjoyed the tangy flavor. Reuben didn't care for it as much.
5) Pecan Pie: Pecans are my favorite nuts, so of course I enjoyed this one.


Now for a few that didn't quite hit the spot:

I couldn't quite like the cocoa mint - I felt that the mint flavor was a bit strong. Reuben said that the cashew cookie was: "Not horrible, but not very tasty." He also took the banana crunch to work one day and didn't like it at all. We liked the rest of the crunch bars - it's just unfortunate that they're made with soy.


In conclusion:

I think these are a fun option for on-the-go snacks, but I wouldn't want to eat copious amounts of them. They work out to about $1.27 a bar, which isn't outrageous but it isn't super cheap either. But they're using higher quality ingredients, so you wouldn't expect them to be as cheap as, say, a candy bar. I might consider purchasing them online at some point, but I'd be much more likely to buy them if I could find them at a local shop.

Shipping is free on their website until January 31st, 2015.


Thank you to Natural Balance Foods for providing these bars so that I could let you guys know what I think of them! As always, all opinions are my own. 

Maple and Onion Jam


Tasty Kitchen Blog Maple and Onion Jam 13.jpg
Tasty Kitchen Blog Maple and Onion Jam 06.jpg
Tasty Kitchen Blog Maple and Onion Jam 10.jpg
Tasty Kitchen Blog Maple and Onion Jam 17.jpg

This jam was delicious: a wonderful blend of savory and sweet. It's great on toast, as a relish for meat, or on a grown-up grilled cheese sandwich. Mmhmm. 

For the grilled cheese I used bacon, butter, Havarti cheese, thinly sliced apple, and the onion jam. It was so very yummy. 

Check out my guest post on the Tasty Kitchen Blog to get the step-by-step instructions and the recipe for this maple onion jam.

Happy Monday!


Maple and Onion Jam