Showing posts with label Main Dish. Show all posts


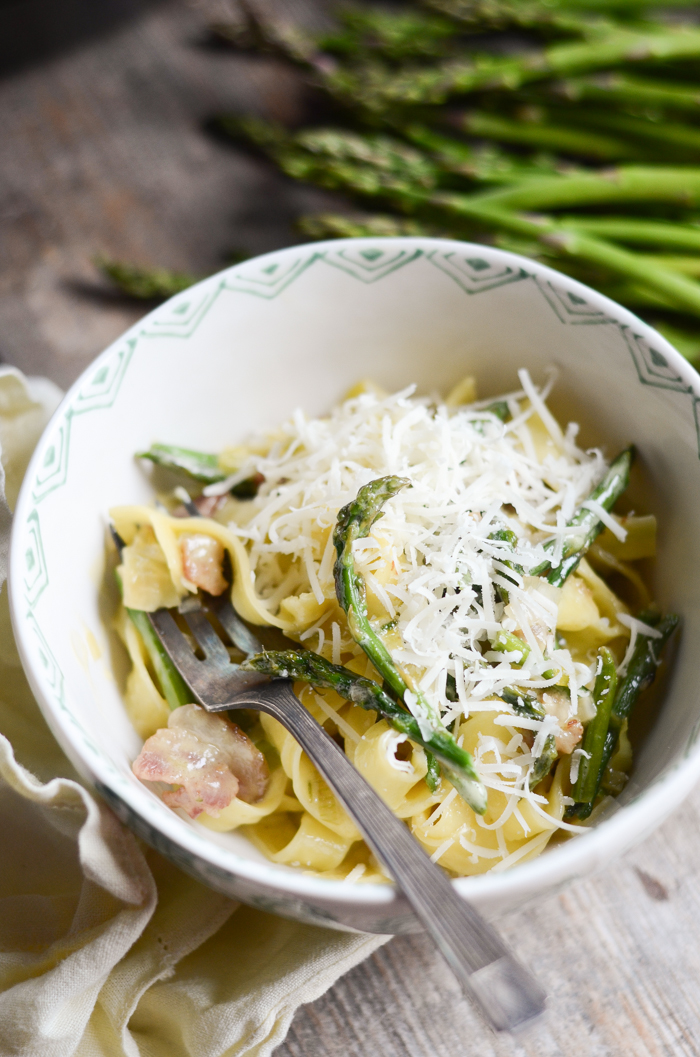
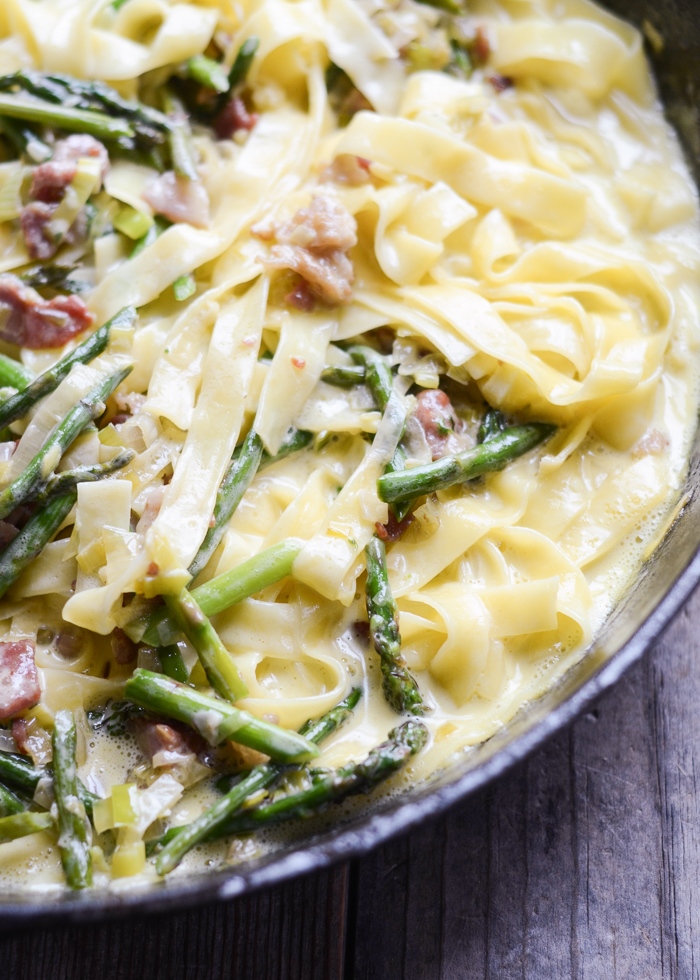
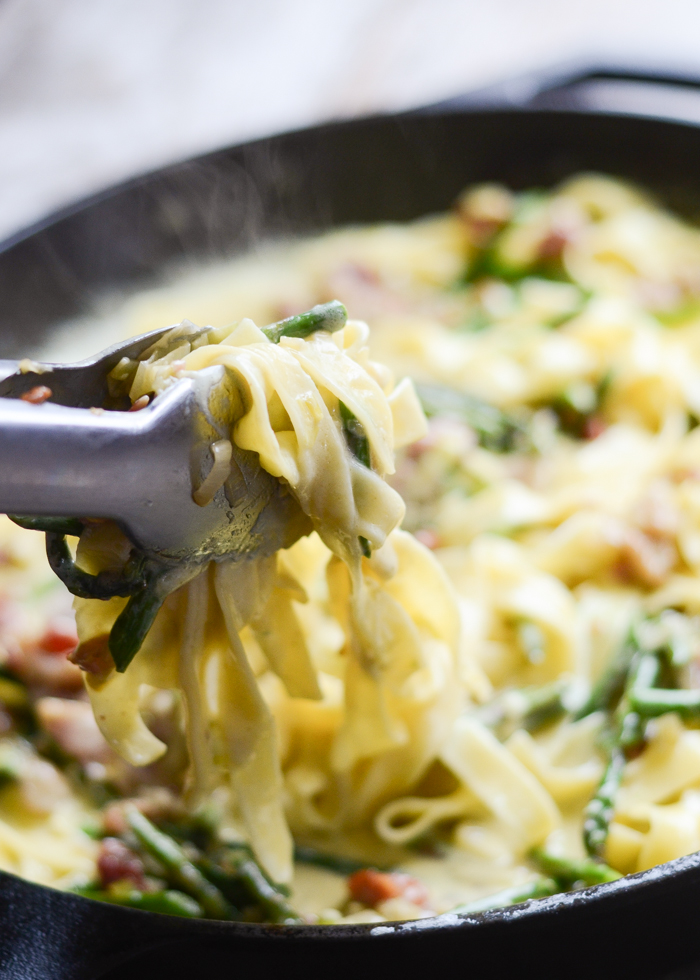
Cream Leek, Asparagus, and Bacon Pasta | Buttered Side Up


Writing definitely does not come easily to me. Sometimes it is SO difficult for me to write up a recipe. I'll have my photos all edited and inserted into the post, only to have them sit in a draft for days because I cannot think of how to begin.

I've struggled with this for over 6 years of blogging. 

I love telling you guys how much I enjoyed a dish, but often times words fail me. Thank you for coming back time and again to read my awkward posts. Thank you for the encouraging (and challenging) comments that you leave. 

Now let me try to describe this awesome pasta.

Before cooking this dish, I had never worked with leeks. I had to look up a video to learn how to clean and chop them. This charming vegetable comes into season in the early spring, so I thought it would be a good choice to share a recipe here on Buttered Side Up that included them. Asparagus is also in season, so I picked up a bunch at the grocery store. Then I realized that they would be a lovely addition of green to my pasta.

The resulting combination of creamy, salty, starchy and fresh made for one delicious meal.

The beauty of this pasta is that it can easily be customized to your preferences. I really like green peas in carbonara. I've never tried it myself, but the recipe I based this pasta off of calls for pancetta. And you don't HAVE to use Tagliatelle - use whatever pasta you have on hand! 

If you decide to make my pasta, make sure to share and tag me on Twitter, Instagram, or leave a comment with a link to your post!


NOTE: If you like crispy bacon, make sure to only add the bacon to the pasta at the end of cooking. I didn't do this, but I definitely will next time.

Creamy Leek, Asparagus and Bacon Tagliatelle
adapted from Blogging Over Thyme | serves 3-4 (depending on how hungry you are) | PRINT

Ingredients:
  • 2 tablespoons butter
  • 6 ounces bacon, finely diced
  • 1/2 of a leek, finely sliced
  • 1/2 cup (7.5 ounces) asparagus, cut on the bias
  • 1 clove of garlic, minced
  • salt, to taste
  • 1 1/2 cups heavy cream
  • 3 egg yolks
  • 1 cup freshly grated parmesan cheese
  • 8 ounces Tagliatelle pasta

Directions:
1) Get a large pot of water going for the pasta. In a large cast iron skillet set over medium-low heat, fry the bacon until crispy. Remove to a bowl and set aside. 

2) Turn heat up to medium. Add 2 tablespoons of butter to the pan. Once melted, add the leek and asparagus. Season with salt. Cook, stirring occasionally, until tender, about 7-10 minutes. Add the garlic and cook 1 more minute. Remove all to a bowl and set aside.

3) Cook pasta according to package instructions, making sure to generously salt the water.

4) Meanwhile, pour the cream into the skillet (set on low heat) and whisk until hot. Slowly ladle half of the cream into the egg yolks, whisking constantly. Return to pan and cook, whisking, until slightly thickened. Stir in the parmesan until melted. Add the vegetables, pasta and bacon. Serve immediately with extra parmesan.


Creamy Leek, Asparagus, and Bacon Tagliatelle


Philly Cheese Steak Pizza | Buttered Side UpPhilly Cheese Steak Pizza | Buttered Side UpPhilly Cheese Steak Pizza | Buttered Side UpPhilly Cheese Steak Pizza | Buttered Side UpPhilly Cheese Steak Pizza | Buttered Side Up

Pizza has long been a favorite thing for me to make at home. It's grand to be able to enjoy such a delicious treat without the guilt of eating highly processed ingredients. It's fun to come up with different flavor combinations.

But homemade pizza is a lot of work; and it can be quite time consuming.

Some of that time can be shaved off by not having to wait for your pizza crust to rise for an hour. With Fleischmann's Pizza Crust Yeast, all you need to do is mix up the dough and shape it. It's ready to bake right away. If you have a few ingredients prepped beforehand, homemade pizza can actually be a feasible weeknight meal!


HERE ARE A FEW TIPS FOR A SPEEDY PIZZA:

  • When you make the sauce for your pizza, make a double batch and refrigerate or freeze half for next time.
  • If you have a weekly prep day, wash and cut all the veggies for your pizza. Cook the meat. Shred the cheese.
  • Use a rapid-rise yeast for those days when you have NO time to wait for the dough to rise.


My one disappointment with this yeast was the number of ingredients. I know they need to add those items to facilitate the quick rise time, but I'm a bit sad to use ingredients that I can't pronounce. However, if it's a choice between takeout and homemade pizza, it's pretty obvious which one will be more healthy. So I don't really bad guilty about using this yeast.

This year, I'd like to try to have a monthly pizza night. Fleischmann's yeast will make it quite doable. And I'm sure Reuben will be thrilled to know that he's ensured homemade pizza at least once a month.

When I asked Reuben what pizza I should make for you guys, he suggested a Philly Cheese Steak Pizza. This man is a genius. And this pizza was delicious. One of the best I've ever made. It was excellent cold as well.


RECIPE NOTES:
I like my pizza crust a bit sweet, so I added some extra sugar to the dough. It helped to balance out all the savory flavors.
If you prefer a crispy crust, I suggest lowering the oven temperature to about 400 - 425 F and increasing the baking time.
This recipe may look long, but all that's required is sauteing the veggies, cooking the meat, making a cheese sauce, and mixing up the dough. Don't get overwhelmed! 
You can ask your butcher to slice your steak very thin if you can't find any already packaged up for you.


PHILLY CHEESE STEAK PIZZA RECIPE
Makes one large (12-13") pizza
Printable Page

Ingredients:

For the cheese sauce:
  • 2 tablespoons butter
  • 2 tablespoons organic all purpose flour
  • 1/2 cup whole milk
  • 1/4 cup shredded provolone cheese
  • 1 tablespoons Parmesan cheese
  • 1/8 teaspoon salt
  • pinch of fresh ground black pepper

For the toppings:
  • 4 1/2 tablespoons butter, divided 
  • 1/2 sweet onion, finely chopped
  • 1/2 green bell pepper, sliced thin
  • 1/2 red bell pepper, sliced thin
  • 4 oz Portobello mushrooms, sliced thin
  • 8 oz. top sirloin steak, sliced thin
  • salt and pepper to taste
  • 1 1/4 cups shredded provolone cheese

For the dough:
  • 1 3/4 - 2 1/4 cups organic all purpose flour
  • 2 tablespoons pure cane sugar
  • 3/4 teaspoon salt
  • 2/3 cup very warm water (120 to 130 degrees F)
  • 3 tablespoons extra virgin olive oil

Directions:

For the toppings:
   In a large cast iron skillet set over medium-low heat, melt 1/2 tablespoon butter. Add the onion, season with salt and pepper and cook, stirring often, until soft and golden, about 20 minutes. Remove to a bowl and set aside.
   In the now-empty skillet, melt 2 tablespoons butter over medium-low heat. Add the peppers and mushrooms, season with salt and pepper, and cook until tender. Remove to a bowl and set aside.
   Turn the heat up to high. Add 2 more tablespoons of butter to the empty skillet. Once the butter is melted, add the slices of steak. Season with salt and pepper. Cook for only about 45-60 seconds per side. Remove to plate. Once the steak is cooled, cut it into small, bite-sized pieces.
For the cheese sauce:
   In a small saucepan over medium-low heat, melt the butter. Whisk in the flour; cook for 1-2 minutes or until bubbly and smooth. Slowly whisk in the milk and cook, stirring constantly, until thick and bubbly, about 2-4 minutes.
   Remove from heat and vigorously stir in the cheeses and salt & pepper. The sauce will be very thick. Taste and adjust seasonings if needed. Set aside.
For the dough:
   Preheat your oven to 450 degrees F. Once the oven is hot, place a pizza stone in the oven to preheat while you're making your pizza.
   In a large mixing bowl, whisk together the flour, yeast, sugar and salt. Add the warm water and oil. Mix together until well combined, about a minute. Gradually add 1/2 cup flour until the dough forms a ball. Add more flour if needed.
   Dump the dough out onto a floured surface (dough will be somewhat sticky). Knead until the dough is smooth and elastic, about 4 minutes. Add additional flour as needed.
To assemble:
   Roll the dough out to a 12-13" circle on parchment paper. Spread the cheese sauce all over the dough. Top with the veggies and meat. Sprinkle the cheese on top.
   Transfer pizza to preheated stone and bake for about 10 minutes, or until the crust is nicely browned and the cheese is melted.

Cheese sauce recipe adapted from Bobby Flay and Betty Crocker. The toppings were inspired by Bobby Flay. Dough recipe adapted from Fleischmann's Yeast.


This post was sponsored by Fleischmann's Yeast. All opinions and words are my own.


Philly Cheese Steak Pizza | With Fleischmann's Pizza Crust Yeast


This post was originally published on September 4, 2012 on Cooking for Seven.


Roasted Cauliflower SoupRoasted Cauliflower Soup
My favorite fall/winter supper is soup. Once you know the basic steps for most soups, it’s so easy to customize and create to your preferences. And there’s just something cozy about a bowl of steaming soup.

Roasted Cauliflower Soup
But on to the soup at hand.
Cauliflower has never been my favorite veggie. On a scale of 1 to beets, it’s about an eight. Then one day, my grandma taught us how to make steamed cauliflower with buttered breadcrumbs. I softened. A little. Then I saw Katie’s recipe for Roasted Garlic & Cauliflower Soup. I caved.

Roasted Cauliflower Soup
I’m so glad I did. Once roasted, the cauliflower develops a lovely flavor. The hints of celery, thyme and roasted garlic are amazing. You should definitely try this soup, even if you are a cauliflower hater. It just might change your mind!

Roasted Cauliflower Soup
Recipe Notes:
  • The original recipe looks quite long and complicated. Do not fear! It comes together quite easily.
  • Also, this recipe is very forgiving. I didn’t have any white wine on hand, so I replaced it with more chicken broth. We’re not huge on bay leaves, so I left that out as well. The bacon suggested sounds yummy, but I think it’s completely optional.


Roasted Garlic & Cauliflower Soup | from Katie Goodman | serves 4-6 | PRINTABLE PAGE
Ingredients:
  • 1 whole head cauliflower
  • 1 large whole head garlic
  • 1/2 tablespoon olive oil
  • 1 tablespoon butter
  • 1 1/2 stalks celery, diced
  • 1 yellow onion, diced
  • 1 carrot, diced
  • 1/2 teaspoon salt
  • 1/4 teaspoon pepper
  • 1/8 teaspoon paprika
  • 1/4 teaspoon dried thyme leaves
  • 1 tablespoon flour
  • 1/3 cup dry white wine
  • 1/2 cup water
  • 2 cups chicken or vegetable broth, plus up to 2 more as needed for desired consistency
  • 1 dried bay leaf
  • 2 teaspoons fresh minced parsley
  • 1/3 cup half and half
  • 3 ounces cooked and crumbled bacon
  • additional oil for serving – olive oil or truffle oil
Directions:
1.) Preheat oven to 400 degrees F.
2.) Cut cauliflower into individual florets. Toss with 1 tablespoon olive oil. Transfer to a foil lined baking sheet. Sprinkle lightly with salt and pepper.
3.) Cut the top off of the head of garlic. Drizzle with olive oil and wrap with foil. Place wrapped garlic on the baking sheet. Roast the cauliflower and garlic at 400 degrees F for 15-20 minutes. When the cauliflower is tender and golden remove from the oven.
4.) The garlic will need to roast for a total of about 25-30 minutes. You can remove it to check it’s progress as needed – it should smell fragrant but not raw, be golden and tender.
5.) Meanwhile, heat the butter in a cast iron dutch oven or medium-large stock pot. Add the onion, celery, and carrot. Saute over medium heat for about 10 minutes. Whisk in the salt, pepper, paprika, thyme, and flour and continue to cook for 2 more minutes.
6.) Add the wine and water, whisking to combine with the flour mixture. Then, slowly add in the 2 cups broth. Add the bay leave and roasted garlic cloves. Bring mixture to a boil, then reduce heat to medium-low and simmer for 10 minutes. Add the cauliflower and simmer an additional 5 minutes.
7.) Remove the bay leaf. Working in batches, add the soup to a blender or food processor and blend until pureed and smooth. Add additional broth during or after blending to achieve desired consistency. After all the batches have been completed, return to the pot. Stir in the half and half and parsley. Cook until just heated through. Adjust salt and pepper for tastes.
8.) Serve immediately, topped with bacon and a drizzle of olive or truffle oil and a side of bread for dipping

Roasted Cauliflower and Garlic Soup


Tasty Kitchen Blog Pollo en Salsa al Horno (Roasted Chicken in Sauce) 05.jpg
Tasty Kitchen Blog Pollo en Salsa al Horno (Roasted Chicken in Sauce) 09.jpg
Tasty Kitchen Blog Pollo en Salsa al Horno (Roasted Chicken in Sauce) 19.jpg
Tasty Kitchen Blog Pollo en Salsa al Horno (Roasted Chicken in Sauce) 22.jpg

If I'm honest, I thought that this chicken was going to be a lot more work than it was. First off, the name makes it sound much too fancy for a weeknight meal. And frying chicken always sounds daunting.

To my surprise, this came together very easily. The hardest part is locating some good saffron. It was well worth it.

Check out the recipe and my step-by-step photos over on the Tasty Kitchen Blog. Enjoy!

Pollo en Salsa al Horno (Roasted Chicken in Sauce)


This was originally published on July 19, 2010 on Cooking for Seven.


Our family loves homemade pizza; but when the days grow more hot and humid, I just don’t feel like turning the oven to 500° for an hour or more. The solution: grilled pizza! Here’s the method I like to use.


How To Grill Pizza | Buttered Side Up
Make sure you have all your toppings ready. Preheat your grill on high. Roll your dough out thinly. Grease a piece of aluminum foil that’s a little larger than your dough. Transfer your dough to the foil and place on a pizza peel.


How To Grill Pizza | Buttered Side Up
Place the dough, foil side up, on the grill and carefully remove the foil. Close the grill, turn it down to medium-high, and cook until you have some nice grill marks, about 2-3 minutes. Flip the dough and cook just until set on the under side, about 30 seconds – 1 minute. Remove to a wire rack. Repeat with any remaining dough.


How To Grill Pizza | Buttered Side Up
Here’s a bit of magic: pressed garlic mixed with olive oil. It will make your pizza rock.


How To Grill Pizza | Buttered Side Up
Place the dough, with grill marks facing up, on your pizza peel. Brush with garlic oil. Add your favorite toppings. We like BBQ chicken pizza.


How To Grill Pizza | Buttered Side Up
Turn your grill down to medium. Carefully transfer the pizza to the grill. Shut the lid and cook until the toppings are hot and the cheese is melted, about 5 minutes. Be sure to check the pizza often or it will burn.


How To Grill Pizza | Buttered Side Up
Transfer to a pizza pan or peel. Cool slightly, cut, and serve.


Grilled Pizza
What You’ll Need:
  • Pizza dough
  • Your favorite toppings
  • Aluminum foil
  • Olive oil for greasing the foil
  • Tongs for turning the dough
  • Metal spatulas for transferring the dough to the grill
  • Garlic and olive oil
  • A pizza peel or pan
Directions:
1) Make sure you have all your toppings ready. Preheat your grill on high. Roll your dough out thinly. Grease a piece of aluminum foil a little larger than your dough. Transfer your dough to the foil and place on a pizza peel.
2) Place the dough, foil side up, on the grill and carefully remove the foil. Close the grill, turn in down to medium-high, and cook until you have some nice grill marks, about 2-3 minutes. Flip the dough and cook just until set on the under side, about 30 seconds – 1 minute. Remove to a wire rack. Repeat with any remaining dough.
3) Place the dough, with grill marks facing up, on your pizza peel. Brush with garlic oil. Add your favorite toppings. We like BBQ chicken pizza.
4) Turn your grill down to medium. Carefully transfer the pizza to the grill. Shut the lid and cook until the toppings are hot and the cheese is melted, about 5 minutes. Be sure to check the pizza often or it will burn. Transfer to a pizza pan or peel. Cool slightly, cut, and serve.


How To Grill Pizza | Buttered Side Up


How To Grill Pizza | Buttered Side Up

How to Grill Pizza

Ramen Noodle Soup
Ramen Noodle Soup
Ramen Noodle Soup
Tasty Kitchen Blog Ramen Noodle Soup 30.jpg

You guys. Have you ever had homemade ramen noodle soup? If you haven't you definitely need to give it a try. It is so so good. Not only are the flavors phenomenal, it's much healthier than the prepackaged variety. And it includes protein in the form of sausage and eggs - it's a much more satisfying meal.

Stop by the Tasty Kitchen Blog and get the step-by-step instructions and printable recipe HERE.

Homemade Ramen Noodle Soup!


Chicken and Biscuits Pot Pie - Buttered Side Up 09
Chicken and Biscuits Pot Pie - Buttered Side Up 07
Chicken and Biscuits Pot Pie - Buttered Side Up 08
Chicken and Biscuits Pot Pie - Buttered Side Up 06
Chicken and Biscuits Pot Pie - Buttered Side Up 03
I have the hardest time coming up with Things to Make for Supper. It's not like it's actually hard to make tasty dinners; but I usually wait until Helen's second nap (around 2:30) to even begin to contemplate supper, and by that time it's pretty much too late to take any meat out of the freezer. Then Helen wakes up and I need to feed her, change her diaper and get her in a good mood so she doesn't scream at me while I'm chopping vegetables. And it's 4:30 and I'm wracking my brain for something to make.

Enough was enough. I decided to start A Planned Menu.

I consulted with Reuben and came up with 2 week rotating menu. Somehow just knowing what I need to cook makes me get it done. I know to plan ahead and buy the food I need for the week and take meat out of the freezer the night before. So far I'm loving it.

This chicken pot pie is one of my favorite suppers on the rotation. It's delicious and so so easy. You needn't fuss over a pie crust: the carbs come in the form of easy-peasy drop biscuits. 

Confession: I dislike cutting butter into flour. It feels like so much work, slicing the butter into small pieces and working it into the flour with a pastry cutter. So I cheated with these biscuits: I melted the butter and added it to the flour along with the sour cream. I really couldn't tell the difference!

Do you ever cheat in the kitchen to make your life easier?

PS: Let me know if you guys would be interested in seeing my two-week-rotating-menu.


Easy Chicken Pot Pie with Sour Cream Biscuits
adapted from Ellie Krieger | makes 6 servings | PRINTABLE PAGE

Ingredients:

For the filling:
  • 1 tablespoon butter
  • 1/4 of a medium onion (more if desired), chopped fine
  • 2 carrots, peeled and sliced thin
  • 2 stalks of celery, sliced thin
  • 2 cloves garlic, minced or chopped fine
  • salt and pepper to taste
  • 1/2 teaspoon dried thyme
  • 1/4 cup all-purpose flour
  • 2 1/2 cups liquid (I used 1/2 cup cream and 2 cups chicken broth, but you can use a combination of milk and any broth you wish)
  • 4 cups cooked chicken
  • 2 cups frozen peas

For the biscuits:
  • 1/2 cup sprouted spelt flour
  • 1/4 cup all-purpose flour
  • 3/4 teaspoon baking powder
  • 1/4 teaspoon baking soda
  • 1/4 teaspoon salt
  • 5 tablespoons butter, melted
  • 1/2 cup sour cream

Directions:

For the filling:
1) In a medium saucepan, melt the butter. Once it's nice and hot, add the onion and cook until softened and transparent. Add the carrots and celery and cover; cook until tender. Add the garlic, salt and pepper to taste and thyme and cook for 2 minutes. Whisk in the flour and cook for an additional 2 minutes.
2) Slowly add the broth and milk or cream, whisking constantly. Bring to a boil. Add the chicken and peas. Taste and adjust seasoning if necessary. Pour into a baking dish (mine was 7" x 9" but you could use a square pan as well).

For the biscuits:
1) Meanwhile, as the filling is coming to a boil, preheat your oven to 375 degrees F (190 C).
2) In a medium bowl, whisk together the flour, baking powder, baking soda and salt. Add the melted butter and sour cream and mix just until combined. 
3) Scoop the biscuits over the prepared filling in 6 large lumps. Bake in preheated oven for 20-25 minutes, or until the filling is bubbly and the biscuits are golden. Remove from oven and allow to cool slightly before serving.


Chicken and Biscuit Pot Pie


Hearty Pasta Sauce From Scratch | Buttered Side Up

Hearty Pasta Sauce From Scratch | Buttered Side Up

Hearty Pasta Sauce From Scratch | Buttered Side Up

Pasta is one of those things that's just hard to mess up. As long as you start with good ingredients, you're sure to end with something delicious.

While at the farmers market the other day, I was inspired by seeing all the fresh tomatoes to make a pasta sauce. I purchased a pepper and onion to accompany it. Another day, at our local health food store, I selected a bunch of vine tomatoes and a box of crimini mushrooms. Plus I had half a pound of grass-fed Italian sausage (also purchased at the farmers market) in the refrigerator to use up.

Once I got home I put Helen down for her nap and started prepping my ingredients. It's almost therapeutic for me to chop vegetables without interruption. I added the ingredients one by one to the pot and slowly cooked them together.

The blend of all the fresh ingredients made for an awesome sauce (yes, I did that on purpose). Reuben heartily approved.

When following this recipe, make sure you add your own personal touch. There's just something satisfying about making a dish your own. If you like your sausage with a kick, by all means use spicy Italian! If you don't care for mushrooms, leave them out! Experiment!


Hearty Pasta Sauce
recipe by Erica Lea of Buttered Side Up | Makes 2-4 servings (depending on how hungry you are)

Ingredients:
  • 1/2 lb. mild Italian sausage
  • 3 tablespoons extra virgin olive oil, divided
  • 1 tablespoon butter
  • 1/2 medium onion, diced small
  • 1 small box crimini (baby bella) mushrooms, thinly sliced
  • 1 bell pepper, thinly sliced
  • salt and pepper to taste
  • 4 medium cloves garlic, minced
  • 6 vine tomatoes (about 1 bunch), diced medium
  • 1 teaspoon dried oregano
  • 2 teaspoons dried basil
  • 1 tablespoon cane sugar
  • your favorite pasta (I used wide egg noodles)

Directions:

1) Cook the sausage until no longer pink.
2) In a Dutch oven, heat 2 tablespoons olive oil and the butter over medium heat. Once the butter is melted, add the onion, lower the heat, and cook until beginning to soften, about 5 minutes. Add the bell pepper and cook until the onions are almost transparent, about 3 more minutes. Add the mushrooms and cook until everything is nice and soft. Add the garlic and salt and pepper to taste and cook for 2 more minutes.
3) Add the tomatoes, oregano, basil, sugar and remaining tablespoon of olive oil. Increase heat to medium and bring to a boil. Simmer until the sauce has thickened, about 20 minutes. Add the cooked sausage and stir to combine.
4) Meanwhile, as the sauce is simmering, bring a pot of water to boil. Add salt and stir in your pasta. Cook to desired firmness (I like mine a little past al dente). Serve with lots of sauce and a sprinkling of parmesan. Enjoy!


Hearty Pasta Sauce From Scratch