Crispy Potato Casserole


Crispy Potato Casserole


First, let's talk life.

For some reason, as Hannah admitted the other day, I've had creative burnout lately. Perhaps it's because I was doing an exercise program which used up lots of my energy. Or maybe because I injured my wrist and everything feels like twice the work as usual. Or it could be that I've just been in a lazy slump.

Whatever the case, it feels like I've been going through the motions and haven't been able to make as many things for you guys as I'd like. And that saddens me. Hopefully December brings renewed creativity!

But about these potatoes.

I must admit that the biggest selling point for this dish is the presentation. All the thin, crispy slices of potatoes look so pretty and impressive. 

You could easily please many people by adding cheese and cream to your potatoes (I'm not saying those are bad additions to potatoes by any means), but sometimes potatoes look their best when they're simple. And if anyone is saddened by the lack of dairy products, you can serve these with sour cream. Pesto is also a delicious condiment.


Notes:
  • You don't want to over-cook these potatoes. There is such a thing as too crispy. Mine were on the edge.
  • Unless you detest it, please don't skip the thyme. It really helps to deepen the flavors.


Crispy Potato and Bacon Casserole
Adapted from Joyously Domestic | Makes 4 servings

Ingredients:
  • 5 medium-sized potatoes (I used russets and reds, but I think golds would work as well)
  • 4 tablespoons butter, melted
  • salt and pepper
  • 3 1/2 ounces bacon, chopped into little pieces
  • thyme sprigs (fresh or dried)

Directions:

Preheat your oven to 375 F (190 C). 

Peel the potatoes and slice them very thinly. Brush a round baking dish (mine was about 7 inches) with some of the butter. Arrange the slices upright in the dish. Pour some of the butter over the potatoes and brush the rest on top of the potatoes.

Sprinkle with salt and freshly ground pepper. Bake, uncovered, for 1 hour and 25 minutes. If the potatoes start to look too dry, brush them with some of the butter in the bottom of the pan.

Meanwhile, as the potatoes are baking, cook the bacon in a cast iron skillet over medium heat until crispy. If you don't like your bacon overly crispy make sure to under cook it slightly. 

Sprinkle the bacon over the potatoes, add a few sprigs of thyme and slide it all back into the over for another 25-35 minutes, or until the potatoes are nicely crisped (but not over-done). Add a bit more salt and pepper if desired. 

Serve hot with sour cream or pesto. Any leftovers can be reheated in a pan with some butter.


How to Soak Pecans for Digestion


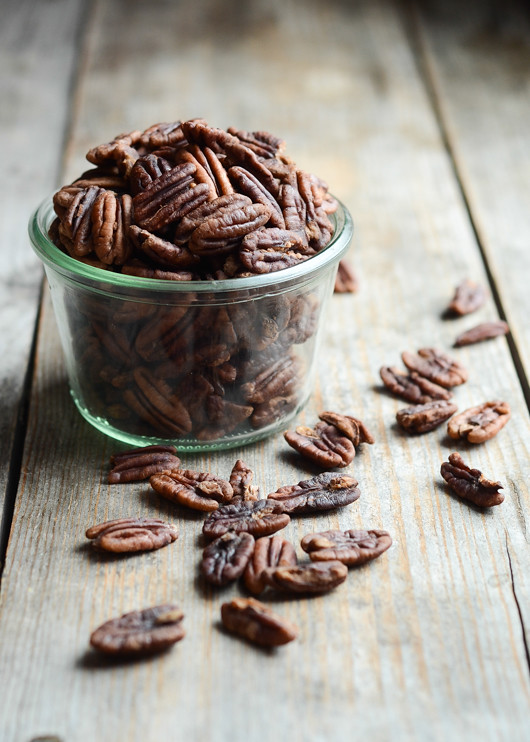
Soaked Pecans | Buttered Side Up

The first thing you might be thinking is: why would I ever want to soak my pecans?

Pecans are a great source of vitamins and minerals. They contain vitamin B1, Copper, Magnesium and Manganese, Zinc, and much more. However, like other nuts and seeds, pecans contain enzyme inhibitors, tannic acid, and phytic acid. These substances can mess with your digestion and absorption of nutrients. Thus the healthy properties in nuts are kind of negated.

What's a health-conscious girl to do?

By soaking your pecans in a briny solution you can deactivate the negative properties. The salt in the soaking water also activates enzymes in the nuts that neutralize the enzyme inhibitors.*

Once your pecans are soaked for the proper amount of time you can dehydrate them to make them a lovely, crispy texture. 

You can read more about the benefits of soaking nuts in this great blog post by Kimi of The Nourishing Gourmet. She also gives methods for soaking other nuts here.

Note: It's important to dehydrate your nuts at the proper temperature. If you go higher than 150 degrees F (65 C), the beneficial enzymes that you activated by soaking can be destroyed. My oven only goes down to 170. Next time I'll leave my oven door open a tad to lower the temperature.


Soaked and Dehydrated Pecans

Ingredients: (can increase amounts as needed)
  • 1 cups of pecans
  • 1/2 teaspoon real salt
  • Filtered water to cover nuts

Directions:

Place the pecans and salt in a glass or stainless steel bowl. Add enough filtered water to cover. Stir. Place a kitchen towel on top and leave in a warm part of your kitchen for at least 7 and up to 12 hours. 

Drain in a colander, spread on a stainless steel cookie sheet (or dehydrator trays) and place in a warm oven (105 to 150 degrees) until the pecans are nice and crispy, stirring occasionally, about 12-24 hours. 

Store in an airtight container in a cool place for a few months, or longer in the refrigerator. 


Note: Some links are affiliate. As always, all opinions are my own.

Nākd Fruit and Nut Bars Review


Nakd Bars Review
Last month, the people at Natural Balance Foods contacted me, wondering if I would be interested in reviewing some of their "Nākd" fruit and nut bars. I had never heard of the brand, so after doing a bit of digging and asking a few questions, I agreed to give them a go!


Nakd Bars Review

Natural Balance Foods is a UK-based brand that has just recently started offering their products to US customers. Their Nākd Bars have no added sugar or syrup and are wheat, dairy and gluten free. 

What initially drew me to try out these bars was the small list of ingredients. Most of them are composed of dried fruit, nuts and natural flavorings.

I was a bit concerned about the "natural flavorings" at first, but the lady I communicated with gave examples of the natural flavor such as "extract from an orange" and "natural chocolate flavour from cocoa powder." 


Nakd Bars Review

The Nākd Crunch Bars do contain "soya protein crunchies." The added crunch was pleasant, but I personally try to avoid soy products.

Another thing to note is that these bars contain nuts that haven't been soaked for optimal nutrition and digestibility. I do think that these are a better choice than the majority of the snack/protein bars on the market, but I wouldn't recommend consuming huge quantities. You can read about the importance of soaking nuts here and here.

Also, some of the bars are listed as "GM Free" on the website, while others are not. I'm not sure if that means that those not listed as GM Free contain genetically modified ingredients or not. I'll let you guys know if I find out.


Favorite Bars

I thought I'd highlight for you guys my top five bars (in no particular order) from the ones I received:

1) Rhubarb Custard: I liked how this one was slightly tangy.
2) Cocoa Orange: To my surprise, this one tasted very much like a tootsie roll!
3) Ginger Bread: I thought the spices went really well together.
4) Berry Delight: I'm a raspberry fan, and again I enjoyed the tangy flavor. Reuben didn't care for it as much.
5) Pecan Pie: Pecans are my favorite nuts, so of course I enjoyed this one.


Now for a few that didn't quite hit the spot:

I couldn't quite like the cocoa mint - I felt that the mint flavor was a bit strong. Reuben said that the cashew cookie was: "Not horrible, but not very tasty." He also took the banana crunch to work one day and didn't like it at all. We liked the rest of the crunch bars - it's just unfortunate that they're made with soy.


In conclusion:

I think these are a fun option for on-the-go snacks, but I wouldn't want to eat copious amounts of them. They work out to about $1.27 a bar, which isn't outrageous but it isn't super cheap either. But they're using higher quality ingredients, so you wouldn't expect them to be as cheap as, say, a candy bar. I might consider purchasing them online at some point, but I'd be much more likely to buy them if I could find them at a local shop.

Shipping is free on their website until January 31st, 2015.


Thank you to Natural Balance Foods for providing these bars so that I could let you guys know what I think of them! As always, all opinions are my own. 

Maple and Onion Jam


Tasty Kitchen Blog Maple and Onion Jam 13.jpg
Tasty Kitchen Blog Maple and Onion Jam 06.jpg
Tasty Kitchen Blog Maple and Onion Jam 10.jpg
Tasty Kitchen Blog Maple and Onion Jam 17.jpg

This jam was delicious: a wonderful blend of savory and sweet. It's great on toast, as a relish for meat, or on a grown-up grilled cheese sandwich. Mmhmm. 

For the grilled cheese I used bacon, butter, Havarti cheese, thinly sliced apple, and the onion jam. It was so very yummy. 

Check out my guest post on the Tasty Kitchen Blog to get the step-by-step instructions and the recipe for this maple onion jam.

Happy Monday!


Maple and Onion Jam

Phone Friday: Pumpkin, Kale and Hashbrowns


Hooray for Friday! 

On Sunday I suddenly contracted a nasty head cold that lasted for a few days. I was unable to do as much recipe testing for y'all as I had planned. There's always next week!


Pumpkin Seeds

I cooked up some pumpkins for puree the other day, and Reuben requested that I roast the pumpkin seeds. I used Nourished Kitchen's method for soaking and cooking them, except I only tossed them in 2 tablespoons of butter instead of the egg whites and other seasonings. They were quite tasty - I had to stop Reuben before he ate them all. :)


Kale Chips

I made kale chips for the first time! It's surprising how easy they are. All you do is wash the leaves and cut out the center rib, massage them with a bit of olive oil, sprinkle with sea salt and bake at 300 for about 25 minutes, rotating halfway through. They got really crispy. Helen loved them.


Hash browns

This morning I had some extra time to make breakfast, so I decided to make hashbrowns. They're Reuben's favorite. He loves them so much that he found a recipe and made them himself the other day. He claims that the ones I made were twice as good as his (I used the same method), but I think it's because of all the butter I put in the pan.

Here's the method: Grate potatoes (we've used russets or reds) over a bowl of cold water. Rinse and squeeze out the excess water using a dishcloth or paper towel.
Heat a large cast iron pan over medium high heat and melt lots of butter (I used half a stick for 2 potatoes). Add the potatoes in a thin layer, turn the heat down to medium and season with some salt and pepper. Cook until crispy. Flip and cook until the other side is crispy. Devour.


Have you tried any new, delicious food this week?

xoxo
Erica


Biscuits + Gravy


This post was originally published on November 9, 2010 on Cooking for Seven. It has been one of my favorite meals (breakfast, lunch or supper) for many years. I still use this recipe today. Speaking of which, I've been meaning to make this again...


Biscuits + Gravy
When I was a little girl (around eight or ten) I would always request Biscuits and Gravy for my birthday. To me, there was no meal more delicious.


Biscuits and Gravy | Buttered Side Up
Hot, homemade biscuits.


Biscuits + Gravy
Crumbled, ready to receive some gravy goodness.


Biscuits + Gravy
Drenched in sausage gravy. Seriously delicious.

Notes:
  •  I have included my favorite recipes for homemade sausage, gravy, and biscuits. You could, of course, use store-bought sausage, but I find that it is often filled with MSG.
  • We usually double or 1.5 times the biscuit recipe. One recipe makes about 12 biscuits.
  • I know this recipe looks long, but it’s definitely worth it.


Homemade Biscuits & Gravy
Ingredients:
For the Biscuits: (Makes about 12, double if desired)
  • 2 cups (8 oz) whole-wheat pastry flour, divided
  • 2 teaspoons baking powder
  • 1/4 teaspoon baking soda
  • 1/2 teaspoon sea salt
  • 6 tablespoons cold butter, cut into small pieces or lard
  • 3/4 cup plus 2 tablespoons buttermilk, plus more if needed
For the Sausage:
  • 1 1/2 teaspoons salt
  • 1/2 teaspoon rubbed sage
  • 1/2 teaspoon rubbed summer savory
  • 1/8 teaspoon ground nutmeg
  • 3/4 teaspoon marjoram
  • 1/2 teaspoon ground pepper
  • 1 pound ground pork
For the Gravy:
  • 12 tablespoons butter or lard
  • 3/4 flour
  • 1 1/2 teaspoons salt
  • 3/4 teaspoon black pepper
  • 6 cups milk
Directions:
For the Biscuits:
Preheat oven to 450° F.
1) In a medium bowl, whisk together 1 3/4 cups flour, baking powder, baking soda, and salt. Add the butter and toss lightly with a fork to coat the butter with flour. Using a pastry cutter, a fork, two knives, or your fingertips, cut the butter into the flour. Work quickly to keep the butter firm.
2) Add 3/4 cup buttermilk; stir with a fork until the dough gathers into one large lump. Add more buttermilk if necessary.
3) Transfer dough to a flat surface sprinkle with remaining 1/4 cup flour. Roll the dough to coat with flour then pat out into a rough rectangle about 1/2-inch thick and fold into thirds. Repeat the patting and rolling. Pat the dough out to a thickness of about 1 inch. Using a 2-inch round cutter, cut out biscuits and place onto an ungreased baking sheet, placing the biscuits 1 inch apart as they will spread.
4) Bake 10-12 minutes or until the biscuits are golden brown.
For the Sausage:
1) Mix all seasonings with the pork thoroughly.
2) Crumble into a pan. Cook on medium heat until no longer pink. Set aside.
For the Gravy:
1) Melt butter in a saucepan set over medium-low heat. Blend in the flour, salt, and pepper. Cook over medium-low heat, stirring, until smooth and bubbly.
2) Slowly stir in milk. Increase heat to medium and cook, stirring constantly, until mixture thickens and comes to a boil. Boil and stir one minute. Add the sausage and stir.
To Eat:
Crumble one or two biscuits onto your plate. Ladle some gravy over the top. Season with salt and pepper to taste. Enjoy!
Serves approximately eight.

Biscuits + Gravy | Buttered Side Up